Caratteristiche
Basata su Debian, distribuzione riconosciuta per stabilità e affidabilità in ambito server, Ubuntu Server ne eredita la solidità integrando aggiornamenti regolari e un ecosistema software ampio e costantemente aggiornato. Ubuntu Server può integrarsi facilmente in infrastrutture eterogenee, consentendo autenticazione centralizzata, condivisione di risorse e interoperabilità con sistemi Linux e Windows tramite protocolli e standard di mercato.
OpenClaw è un assistente AI open-source eseguibile su infrastruttura dedicata o cloud, che consente:
- l'esecuzione locale di un agente AI con controllo completo dei dati;
- il collegamento a provider AI (es. Claude, GPT) e integrazione con canali come WhatsApp, Telegram, Slack, Discord e WebChat.
Questo template accelera il provisioning di un'istanza pronta all'uso con OpenClaw per automazioni, chatbot personalizzati e assistenza intelligente.
Il pannello viene esposto tramite proxy NGINX installato sulla VM.
Di default sono presenti certificati self-signed. Se necessario, è possibile generare certificati ad hoc per esporlo sul proprio dominio personale tramite Certbot, installabile con il seguente comando:
apt install certbot python3-certbot-nginx
È necessario adattare il Virtual Host come da esempio:
/etc/nginx/sites-enabled/openclaw-vhost.conf
Nel contenuto del Virtual Host è necessario modificare il parametro
server_name.
server {
# SSL configuration
listen 18790 ssl default_server;
listen [::]:18790 ssl default_server;
include snippets/snakeoil.conf;
root /var/www/html;
# Add index.php to the list if you are using PHP
index index.html index.htm index.nginx-debian.html;
server_name openclaw.ilmiodominio.it;
auth_basic "Administrator’s Area";
auth_basic_user_file /etc/nginx/.basicauth;
# WebSocket support & streaming (CRITICAL for OpenClaw)
location / {
proxy_pass http://127.0.0.1:18789;
proxy_http_version 1.1;
proxy_set_header Upgrade $http_upgrade;
proxy_set_header Connection "upgrade";
proxy_set_header Host $host;
proxy_set_header X-Real-IP $remote_addr;
proxy_set_header X-Forwarded-For $proxy_add_x_forwarded_for;
proxy_set_header X-Forwarded-Proto $scheme;
# IMPORTANT: Disable buffering for streaming responses
proxy_buffering off;
proxy_cache off;
# Allow long-running model responses
proxy_read_timeout 600s;
proxy_send_timeout 600s;
# Allow large file uploads (for RAG documents)
client_max_body_size 50M;
}
# deny access to .htaccess files, if Apache's document root
# concurs with nginx's one
#
location ~ /\.ht {
deny all;
}
}
Il certificato può essere richiesto con il seguente comando:
certbot --nginx
root@openclaw:~# certbot --nginx
Saving debug log to /var/log/letsencrypt/letsencrypt.log
Enter email address (used for urgent renewal and security notices)
(Enter 'c' to cancel): [email protected]
- - - - - - - - - - - - - - - - - - - - - - - - - - - - - - - - - - - - - - - -
Please read the Terms of Service at
https://letsencrypt.org/documents/LE-SA-v1.6-August-18-2025.pdf. You must agree
in order to register with the ACME server. Do you agree?
- - - - - - - - - - - - - - - - - - - - - - - - - - - - - - - - - - - - - - - -
(Y)es/(N)o: Y
- - - - - - - - - - - - - - - - - - - - - - - - - - - - - - - - - - - - - - - -
Would you be willing, once your first certificate is successfully issued, to
share your email address with the Electronic Frontier Foundation, a founding
partner of the Let's Encrypt project and the non-profit organization that
develops Certbot? We'd like to send you email about our work encrypting the web,
EFF news, campaigns, and ways to support digital freedom.
- - - - - - - - - - - - - - - - - - - - - - - - - - - - - - - - - - - - - - - -
(Y)es/(N)o: N
Account registered.
Which names would you like to activate HTTPS for?
We recommend selecting either all domains, or all domains in a VirtualHost/server block.
- - - - - - - - - - - - - - - - - - - - - - - - - - - - - - - - - - - - - - - -
1: openclaw.ilmiodominio.it
- - - - - - - - - - - - - - - - - - - - - - - - - - - - - - - - - - - - - - - -
Select the appropriate numbers separated by commas and/or spaces, or leave input
blank to select all options shown (Enter 'c' to cancel): 1
Requesting a certificate for openclaw.ilmiodominio.it
Come accedere
L'accesso amministrativo viene fornito tramite SSH, con utente root e la password scelta in fase di creazione.
L'interfaccia di OpenClaw è accessibile al primo avvio tramite l'indirizzo così composto:
https://
IP_PUBBLICO:18790/
Le credenziali da utilizzare al primo accesso sono admin e la password fornita in fase di creazione.

È necessario modificare l'URL per poter abilitare l'accesso come di seguito indicato:
- recuperare il token presente a bordo macchina tramite il comando:
root@openclaw:~# cat .openclaw/.setup-token
ILMIOTOKEN
- modificare l'URL così composto:
https://IP_PUBBLICO:18790/#token=ILMIOTOKEN

- è ora necessario autorizzare il dispositivo browser per poter utilizzare OpenClaw a bordo macchina con il comando:
root@openclaw:~# openclaw devices list

- prendere il requestID e lanciare il comando:
root@openclaw:~# openclaw devices approve d66bf426-3088-40be-8e46-b35440c22dcb
🦞 OpenClaw 2026.2.12 (f9e444d) — The only bot that stays out of your training set.
│
◇
Approved 911a4097d7b03d46c4733d0b61ef7d9f770119522329480e50173398798ca061
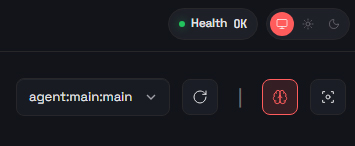
- nel browser dovrebbe comparire:
- di default l'onboarding viene eseguito senza selezionare alcun modello e nessun provider;
- qualora il cliente volesse agganciare OpenClaw a un qualsiasi provider dovrà effettuare l'onboarding a bordo macchina tramite il comando:
openclaw onboard
senza alterare la configurazione del localgateway.
Configurazioni
Su questo template è disponibile Fail2ban.
Fail2ban attivo:
- Retry: 5
- Find Time: 60 min
- Ban Time: 60 min
Firewall UFW: aperte solo le porte 22 e 18790 TCP.
Per motivi di sicurezza le seguenti porte non sono disponibili su rete pubblica dal servizio Aruba Cloud:
135 TCP UDP
137 TCP UDP
138 TCP UDP
139 TCP UDP
445 TCP
Versione del Template
1.0
Changelog
-